Powder baths are usually simple and boring. That is if you can call them that.
My husband hates that I call it that, so maybe a half-bath or guest bath is better...you choose. These are the spots the builder blazes over. Bottom of the line fixtures, and sinks, and flooring. In my last house the light fixture was never actually attached with a box, just kinda hanging there. In my line of work I come across alot of powder baths, that need alot of help. Mine was on the top of the help list!
We replaced everything in this bathroom, including the toilet and sink.
 |
Before / After |
Here's what we did....
I really wanted wood walls, but I didn't want to buy reclaimed wood since I planned on painting it. It felt like a waste of money. I didn't want new wood either. The only thing I could think of was fence boards, used ones. When I tole my husband my idea, he thought I was crazy. He mentioned good points, including bugs being in the wood. One day though, while driving home, I saw a couple guys taking down a fence. I called my husabnd and asked him to stop and check it out. He did and they said they would leave some there for us. surprisingly My husband went back and picked them up, though he did mention more than 10 times how it didn't seem like a good idea after he got them home. I realized he changed his mind when he started pulling out nails...what a good guy!
We measured the walls and cut the boards to size, one full board for the length of the wall. Some boards were more dilapidated than others. I wanted to see the age in them, and the knots.
We measured the walls and cut the boards to size, one full board for the length of the wall. Some boards were more dilapidated than others. I wanted to see the age in them, and the knots.
We cut around the pipes, and plugs, as close as we could get.
I didn't want any kind of base boards, so we started form the floor and went up. Just put a screw in the studs on two spots on each board.
I painted the wood with a white floor paint. Why floor paint? I have 3 kids, and durability is a must. Especially with a toddler on the toilet, picking on the wall.
I also like the finish of this paint, its a satin look. Regular satin paint on this wood, would really soak in, and take 3 coats to give the look, and probably look over-painted. I like the sparsely painted look of this wood.
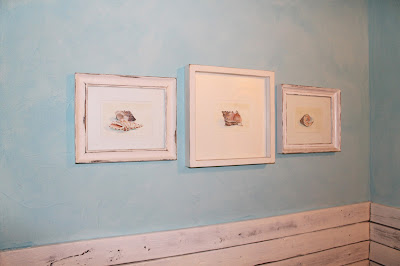
On the top, I plastered the wall with a smooth texture paint, and added a blue glaze. This is not a technique for beginners, since the glaze sucks into the plaster immediately. Any blue color on the top would still work, plaster or not.
I love this light, from Barn Light Electric. I was going for ambiance, so I used a Eddison bulb, it does cast a soft glow. This also makes it a bit hard to see the fixture itself. So a couple minutes standing on top of the toilet to check it out every so often is necessary :)
The mirror was a tough find. I was just looking for the shape and size. Paint can fix anything. It was a cheap brown mirror from Home Goods, or Hobby Lobby I think. I used two colors of yellow paint, since it was my accent color. Once dried I sanded down some of the edges. With a white round rug from World Market, and a yellow and white floral hand towel, it all fits together perfectly. If I get tired of yellow, all I have to do is change a hand towel, and a coat of paint on the mirror.
This bathroom was very inexpensive...
less than $400 for everything, including the sink and toilet.
Not bad!


No comments :
Post a Comment