
Today I'm going to show you a very simple, stencil how-to. You may be a beginer...or you may have used stencils in the past, and that's awesome too. But be sure to check out some helpful tips for getting the job done right, and don't forget to check out the stencil giveaway at the bottom of the post!!

This is my daughters room in our temporary apartment, that just got a makeover for her 13th birthday. I opted for something simple, and that took minimal effort to paint over when we move. I chose a small focal wall for the treatment.
Let me show you how its done....

To start, what supplies do you need??
If you are new to stenciling, or if you don't already have all the tools, I would grab a "Stencil Essential Kit". This will have everything you need to start any stencil project. If you plan on using lots of colors on one stencil, I would recommend purchasing more than one stencil brush. They are sold in a pack, or individually. The kit also comes with a foam roller, perfect for using one color on a stencil, and a clip on level (a life saver).


Choosing the right stencil for the job, can be exciting, and a little daunting. There are soooo many choices. Keep the size of your project in mind.
How many walls are you doing?
How many colors are you using?
The more colors you have to stipple, the longer it will take. An all over pattern, will use just one color, but will require the entire surface to be covered, and extra time to carefully line everything up. Furniture pieces, and focal walls are a good place to start for a beginner.
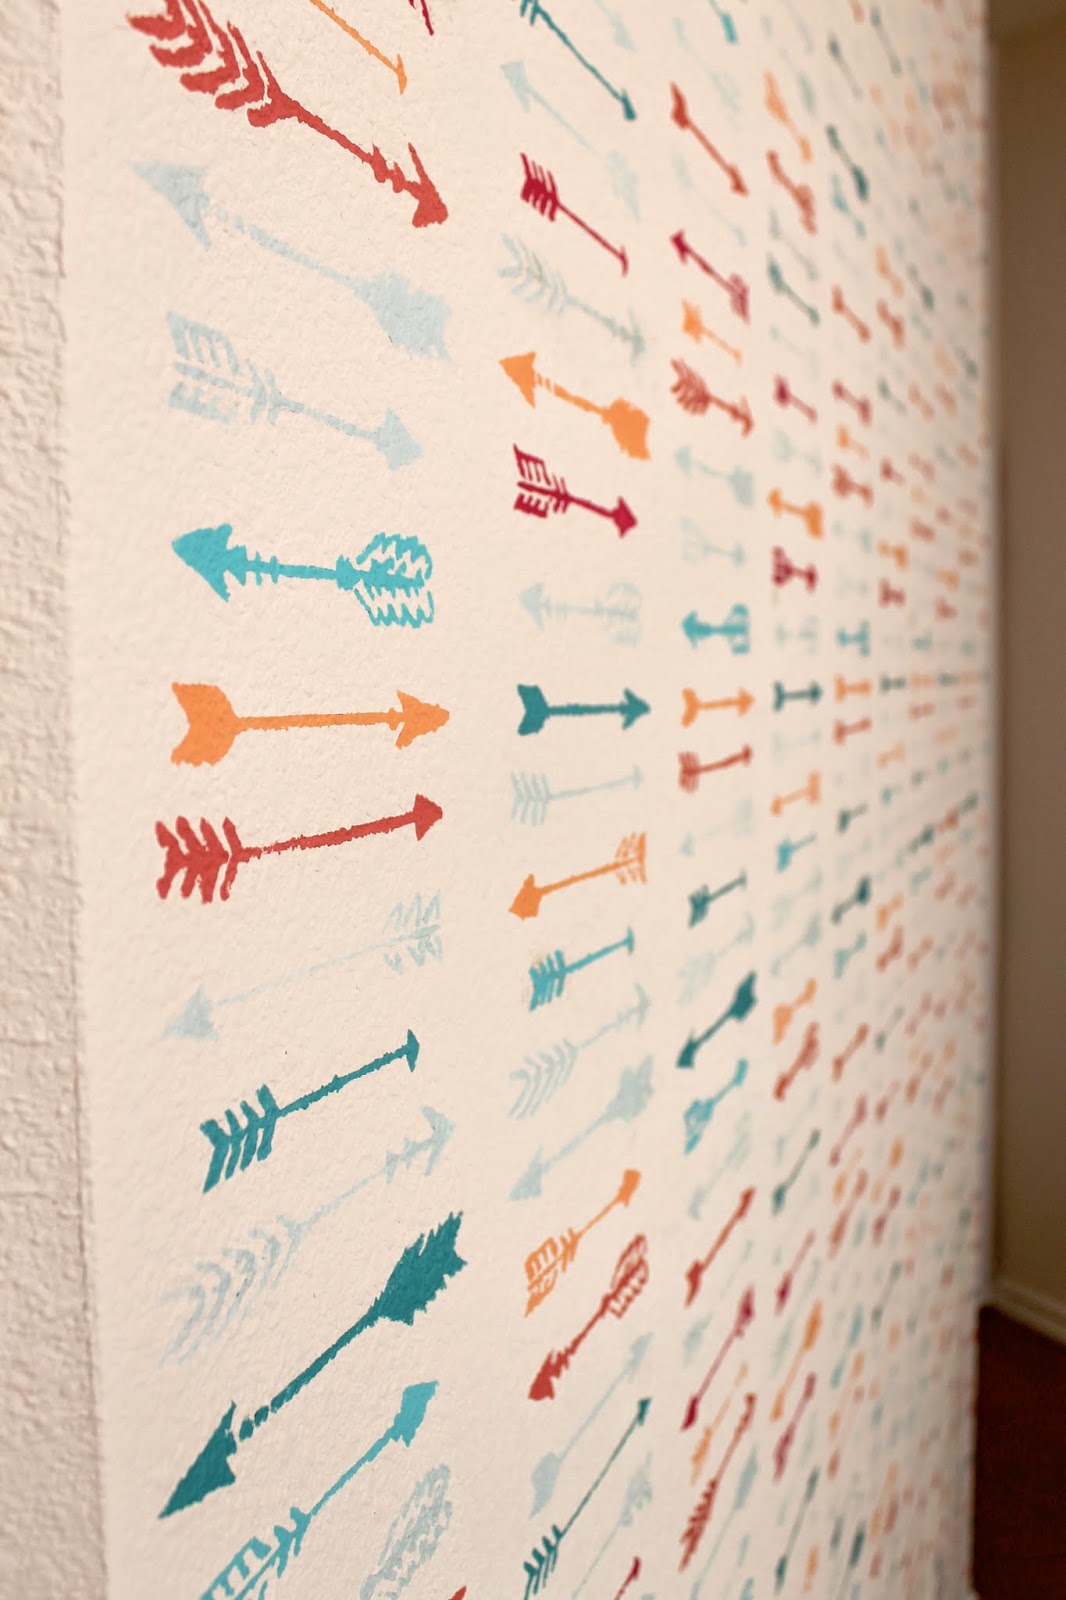
In this room, I chose the Indian Arrows Stencil, by Cutting Edge Stencils. It also comes in a simple border type as well. This stencil is still considered an all over stencil, which means you line up one corner of the stencil, with the previous part you just painted....Even thought the whole wall isn't actually covered. A border stencil is just one row of the arrows.

For the paint, there are lots of options. I did a small wall here, so I just used tubes of acrylic paint. You can also use sample sizes of latex, or whatever you have on hand. A latex will cover better, as the acrylic paints tend to be a dryer finish as you are painting, and may not spread as well. Just make sure to use a minimal amount of paint for any type, so your paint doesn't bleed though. I have several sizes of stencil brushes, and I was using lots of colors, so they all got used. I like to use a sticky spray of some sort as well, any kind of temporary bond or light bond adhesive will work here. It just helps your stencil stick a bit as you position it. Masking tape for the edges of the stencil, to hang on the wall. Lastly, paper plates for the paint.


Ok you guys this is going to sounds so silly, but I have been painting for almost 16 years, and Iv'e done LOTS of different kinds of stencils.....and I have never used a level.
I WISH I COULD GO BACK IN TIME!!!
I'm not sure when this was actually created, I guess I didn't get the memo! But this is the best tool ever!!! The stress of trying to make sure it is all lined up just so, is time consuming, and I still didn't get it right every time. If you don't end up needing a whole kit, you can purchase it separately here. Small price to pay, to not deal with the headache of it. Even if it's an all over stencil, and it seems like you can just line it up perfect......you can't get it perfect.

It just clips on to the top of the stencil. Just make sure you verify that it is pushed down even on the top, on each new placement of the stencil. You may accidentally grab it as you pull the stencil off, and then your lines are off.

Again, I just use a light amount of spray, maybe every other painted section of wall.

I like to start in an inconspicuous spot, to hide any imperfections on your first pass.
The corner of a wall, is also a good spot to really get lined up. You could also start at a top corner, but then you in the air on the top of a ladder, with multiple paint colors, and it can be a little distracting at first.


I just lay out my paint in a row, to start my pattern.

I was using more of the lightest blue so I just grabbed the bigger brush, but the same rules go for any size. Lightly dab some paint on, and squash it back off.

You don't want the bristles completely wet, or coated in paint. Or the paint will start to bleed under each area. These openings are small, and there's alot of them, so it would be alot of touch up. Next your just going to stipple the brush on the wall.
All that means, is pouncing at it, straight on.
If you push to the left or right, or up or down, the bristles will push under the plastic. This is why the brush is so stiff with a shorter length.


Same thing goes with the smaller brush.


When you start putting multiple colors on the stencil, be mindful on the first pass, of what you want and where. It will set the pattern, and make it easier to follow later. Once all the colors are done, pull it off and move to the next area.
In the picture below on the top right corner, you can see a small piece of arrow, and one at the bottom as well. This is your guide for when you move the stencil. You will line the next row up with this piece. Allover stencils will all have something like this, where you can match up the pattern to the next section.


The coloring came out a bit darker than I wanted here, and the picture makes it look darker than it really is. I used a hot pink, a peach, a coral, and several shades of blue.


As a pattern of placement on the wall, I typically start on bottom left corner, since the markers to match the stencil up are at the top and bottom right. Then I move up one, then over one. Then up one, then over one. I usually get the bottom half done without a ladder, then move up. By this point you have developed a rhythm, and it comes easy. You will also know your color pattern well.
That is it you guys, sooo easy, just take your time.
Be patient while the stencil dries a minute or two between sections. You can always dab the back with a rag, if there are any bleed throughs, to help the drying process.
Using a stencil on a smaller area makes it more powerful, the whole room doesnt need the same treatment.

Something like this is very easy to paint over when it's time to move. So if your in an apartment, a temporary home, or just love to change it up all the time, this kind of treatment is perfect. You could also use the border stencil at chest height around the room, as a way to bring a room together, and cut down on the cost of artwork. It almost acts as a stripe. Keep something like that simple though, with just one color. You don't want to overwhelm a space with to much pattern.
Here is the completed room.
If you missed the post on the reveal, check that out here...

More how-to's from this room are coming!!
Don't forget to sign up for the giveaway, lots of ways to enter!!!


A big THANK YOU to Cutting Edge Stencils, for this beautiful stencil, and for sponsoring this post. All thoughts, and opinions are my own!
a Rafflecopter giveaway
Find other how-to's here.....
Girl's Modern DIY Room Makeover
Pink Upholstered Headboard
Custom Made Turquoise & Gold Nightstand
Painted Laundry Basket, Painted Mirror
Find other how-to's here.....
Girl's Modern DIY Room Makeover
Pink Upholstered Headboard
Custom Made Turquoise & Gold Nightstand
Painted Laundry Basket, Painted Mirror
I love this arrow wall. and the colors you chose a perfect for the space!
ReplyDeleteGreat job!! Love you stencil work!!
ReplyDeleteSuch a darling stencil!
ReplyDeleteLove, Love, Love this for Aubrie's room!
ReplyDeleteLove it!
ReplyDeleteI love this!
ReplyDeleteLoved it!!
ReplyDeleteI LOVE these stencils and need them!
ReplyDeletexoxo
I like the BIRCH FOREST ALLOVER STENCIL and want to use it in our master bath!
ReplyDeleteCINDY B on rafflecopter
Great job!!!! I'm loving the chevron and Casablanca stencil!
ReplyDeleteI love how the wall came out. I love the arrow stencil. Lovely!
ReplyDeleteWhat a great choice in color scheme! I love it!
ReplyDeleteI like the bird and butterfly stencils.
ReplyDeletei love the Resonance Wall Art Stencil
ReplyDeleteI love the roses all over stencil!
ReplyDeleteI love the Drifting Arrows stencil. Thank you for the awesome giveaway and blog post! I can definetely see myself referring back to this post in the future.
ReplyDelete