Showing posts with label woodland boys. Show all posts

Thursday, March 19, 2015

Good Housekeeping Double Feature!


Just a quick hello, at the end of a long week, to share some exciting news....
I had a double feature on  Good Houekeeping!
YAY!!
Be sure to check out all 10 of these fun kids rooms.

10 Super-Fun Themes for Creative Kids' Rooms


Here are my two rooms in this fun list of spaces...
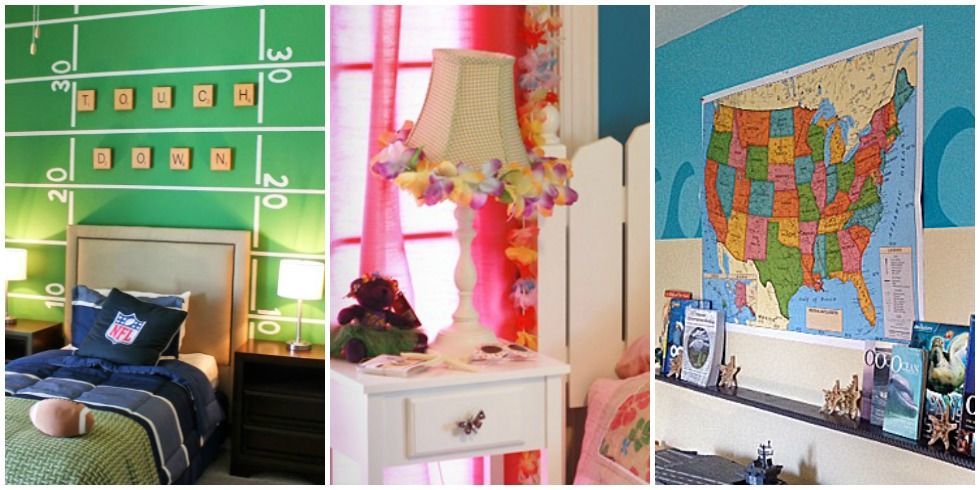
For the kid who lives in jerseys and grass stains, a football field wall means it's game time all the time. Complement the sporty look with DIY bedding in his favorite team's colors.
See more at The Ragged Wren »
Sports Themed Bedroom
Love this football room. Such a simple treatment, with big results. Find the full How-to HERE.
Room Designed by Dy Lynne Decor
Room Painted by ME

This isn't your average canopy: A dramatic drape turns a twin-sized bed into the comfiest tent ever while a pretend fire makes for the perfect gathering place for sharing ghost stories, songs, and snacks. Finish off with plenty of snuggly flannel blankets for a cozy campfire feel.
See more at The Ragged Wren »
Camp Out Bedroom

This room is my sons old bedroom that I designed, and painted. 
The tent and the campfire are all handmade. Check out the How-To for each here...


Hope it's warming up wherever you are.....Have a great weekend!

Thursday, June 12, 2014

Kids Rooms Collection

So for the past week or so, I have been showing you simple DIY paint and decor tips, to enhance kids rooms, or adult bedrooms for that matter. Use these tips all over the house really. 

So here is what I have shown you so far....


If all of that wasn't enough to get your creative juices flowing, here are some bedroom spaces I have shown in the past, all grouped in one spot.
Click on any of the links, to take you back to the original post for a how-to, or tips and tricks for pulling it all together. 


Wednesday, April 16, 2014

Modern Woodland Bedroom

Woodland themed rooms seem to be all the rage these days, heck I have one in my house right now. They are fun, playful, and bring the outdoors in. 
Making a woodland space for an older boy though, can pose a challenge. They don't want soft and cuddly, and they don't want tents, and campfires.  So, I thought I would give you a couple simple tricks to pulling off a modern woodland bedroom, with a room designed by my favorite designers, at Dy Lynne Decor.


1. Use bold, warm colors. Keeping in rustic palettes will give off the vibe of woodland, without having a bunch of themey fabrics. In this room the wall color is a grey-green tone. The accent color used, was a deep maroon. By adding splashes of grey, and a dark wood grain, the room feels rounded off, but not overly simple. 


 2. Woodland art is a must! For the younger crowd, owls, and cute little foxes are the perfect fit, but in this grown-up boy room, It wouldn't last him many years. For the art work in this room, a simple silhouette is enough to let you know the overall theme. Keeping in the same shades from the rest of the room, helps it from overpowering the space. The pattern, and scale pull in the modern vibe. I love how these two are mounted, off set to each other, this keeps your eye moving around the room, and makes it more interesting to look at. 

3.Accessorize. This is where people tend to go overboard on a room, making it too themey. You don't need to buy every piece of woodland decor you see. Some books about the outdoors stack on the nightstand, and a simple silver faux deer head, is just he right amount to balance off this side of the room.


A lamp, with a chevron grey and white lampshade, and a box of faux antlers, help balance out the dresser on the other side of the room.

It doesn't take alot to pull this look off, and modern is the perfect way to go with simple (and inexpensive) decor and design elements. 
This would also be a great way to make a hunting themed room. Here in Texas, hunting is big, with just a few adjustments in the accessories, the whole theme could be changed.

The deer art is such a big part of this room, check out the how-to for this super simple DIY art piece.


How-To: Making Deer Art
To start, I used a large roll of craft paper to sketch out my deer head. You could also use some left over wrapping paper for this (you know, that ugly one you have had tucked away for the past 5 years). If your not ready to free-hand a deer just yet....print off some clip art in a larger scale. You don't want it to fill up your entire space, so keep it about 3"-6" away from the edge. 


Carefully cut your new pet out, taking extra care with the antlers. You only need one of these for this project, you can just flip it over to make a matching piece, if your doing two. 


Lay out the little guy, making sure he is right where you want him, get a level if you need it (you don't want to have to start over because he's tilted). Trace around the craft paper cutting. 


Though you may not be able to see it, this is the canvas with the tracing on it (I work in the middle of the night, which means very dim lighting).


The next step is to paint your darker color. Try to stay in the lines, although after all these years, I'm still having trouble with that. You will be going back over the white, so don't worry to much. 


If you opt to do a pattern of the back, this is when to do it. I think it gives it more character, but if you want super simple, leave it plain. For a quick fix, you can pick up a simple pattered stencil at Micheal's or Hobby Lobby. If you have a bit of time to order one, you can find a much larger variety of stencils, online at  Royal Design Studios.
Try to keep the pattern simple, you don't want to change the focus. 


Keep the stencil out of the white as much as possible, it's just more to cover up later. 


Lastly, you will need to fill in the white space, some areas my need more than one coat to cover up any grey that overlapped.

And there you have it....very simple. 


You could do this with any theme, or any animal really. It works best on something with a detailed silhouette. A hippo for instance, may just look like a blob. It would be cute with a yellow background, and a giraffe head, or a leathered background and a football silhouette....the possibilities are endless.


This bedroom was designed, and decorated by the team at Dy Lynne Decor.

Friday, March 21, 2014

Remodelaholic Feature!

Happy Saturday everyone! 
I have exciting news to share today, one of my favorite DIY projects, is being featured on one of my favorite DIY blogs!! 
How fun is that?!?

My son's camping tent bed how-to, is being featured over at  Remodelaholic.com.
If you don't know Remodelaholic already, you need to! 
It is full of all sorts of project ideas, how-to's, and inspiration.....perfect for the remodelaholic, like myself. 


Check out the full feature on Remodelaholic, by  clicking here.

Also, be sure check out the rest of the camping room, and the campfire how to.

Tuesday, October 29, 2013

Campfire How-To


When making the camping room for my son, I new I had to have a campfire. I found a couple on Etsy that were cute, but all in felt. I looked at doing a felt version, but didn't really like the completed look of it. I wanted something more realistic. I finally got around to making this right before his 3rd birthday. I wanted to make a whole gift around it. 
I made the campfire set, and added a picnic basket full of camping necessities. 
I found a felt sandwich set, by Melissa & Doug. 

We also purchased some plastic camping toys, a canteen, a lantern that makes nature sounds, roasting sticks with marshmallows and hot dogs. All by Insect Lore, found on Amazon.


The campfire was very easy to make, and inexpensive. 
Here's How-To make it...

 I started by looking for fabrics that looked like the pieces I was making. A bark fabric for the logs, a orangey-yellow fabric for the flames, a tan or grey for the rocks, and a brown for the dirt at the base of the fire. 


For the base of the fire, I used a thick piece of plastic board, but cardboard could work as well. Cut it in an oval shape, wrapped the fabric over it, and hot glued it in the back. 

The rocks were next. I started with a randomly cut shape. You don't want them round, like balls, and each one should  be different. Use cotton stuffing for the insides. I just cinched the fabric around it, and stitched it closed, or you could hot glue it closed. Then I hot glued them to the base, sort-of overlapping some and making them look irregular, more like real rocks.


For the logs, I cut out rectangles in the length, that I wanted the logs. Again they all shouldn't be the same size, random is better. I made 4 of them. I used a muslin fabric for the ends, just cutting a circle shape. Before sewing anything together, I made the rings on the end pieces. I used the sewing machine, and brown thread. Staying away from the edges, I just rotated the pieces, and made two different circles. I folded the bark pieces right sides together, and sewed down the long side. Turn the bark piece right side out.  Place one of the circles along the seam of the log an sew them together. I left about 1/4" gap, and frayed the edged's. Stuff it with the cotton stuffing, doesn't need be super tight. I did the same for the other side. You can hand stitch it if its to tight on the machine.

The fire is a similar technique. Cut a shape out of the orangey fabric, you will need a front and a back. I made three sets of these. Keep the pieces backs to backs, and stitch around the edges (the dotted line), about 1/4" away. Leave part of the bottom open, and stuff the cotton batting into the flames. I used a pencil end, to get it in the tops. Then hand sewed the bottom to close it. You can fray the edges, gives it a firey look. 
I stitched the sides of two of these together, on each side, where it says "here". There will be an opening between the two. Fold the last piece of flames, and stuff it in the hole between the other two. You can add a dab of hot glue to keep it from moving. 


For the log seats. I used the same technique as the logs. I started with a thick piece of foam, from Hobby Lobby. I used a 2"x15"x17" piece for each seat. Cut it into sort of a circle shape. I used a serrated knife for this.


I set it on the bark fabric and marked how thick, and long, the sides needed to be. The top and bottom were done the same way as the end of the logs. I made rings using the sewing machine, and brown thread. Again, fraying the edges.


This has become a family spot for us. Every night we sit around the campfire to read a bedtime story. My son picks out food for us all, everything gets cooked over the fire, even the sandwiches :) 
See the whole room here, and check out how-to make the camping tent.


Hope this "sparks" an idea, for a place, for you and your family to spend time together. 

Check us out over at Uncommon Designs, Monday Funday Link Party too.

Monday Funday at Uncommon Designs