
Hey all...I hope you are recovering from Thanksgiving, and getting prepped for Christmas.
Our decorations are almost all finished here, pictures of that coming soon.
For now, I wanted to give you a fun How-To.
I'm so excited to show you this awesome paint tool.
I found this sometime last year, and have been ogling it ever since. I finally broke down a couple months ago, and bought some pieces. I didn't have a project to use it on, but I had to try it out.
Since then, I've used it on a couple occasions now, its so easy, and looks beautiful.
I got this one from Not Wallpaper on Etsy.

A setup like this costs about $37.
There are several parts to this set up....

The first is the applicator...this one is angled, which makes it much easier to roll onto the wall.
Alone, these run $18, and come with one foam applicator pad.
 |

The foam applicators can also be purchased separately, its good to have backups.

And the patterned roller, in any design. By themselves these run $19.

What to do...
The foam rollers clip in to the applicator, about halfway down the metal frame. There are several holes since the roller heads range slightly in size.

Once the foam roller is attached...this is where you will load it with paint. It needs to be fully covered. So run it through a couple of times.

It doesn't need to be globed on, so rolling off any excess on the tray.

Once the foam roller is prepped, the patterned roller needs to be attached. This is where it gets a bit tricky, and messy. You need to wedge the roller on the frame, with out dropping the foam roller out.
I just held the top of the foam roller with a finger, while I wedged the patterned one in. The fit close, the foam needs to be touching the patterned roller.

Now that the system is set up and ready to go...I like to cover the roller with paint, and get off any access paint. Roll it one or two times along some paper or poster board.

Now to get painting!
This is where a little practice comes in, don't just go straight to your walls.
The process takes a little getting used to, so it's best to try it on a piece of poster board a couple of times.
On the blue plastic pieces that hold the roller to the applicator, there is a set of blues triangles.
Get one set lined up to start, on the second pass, you will start with the other triangle.
This will make it so your pattern isn't the same straight across the wall.
You will want to start at a top corner, working your way all the way down, in one straight roll.

I say straight, but I will be perfectly honest with you, and say, straight is hard to do. Once the whole wall is done, you wont notice a little curve.
Go slow so you can keep an eye on it.
You can see here, how I butted the two lines up to each other. You don't want to overlap the design, and if you go to far away from the previous pass, there will be a gap.

The foam roller does hold alot of paint, but I could only get one good solid pass of paint, before I felt like I should reload. You could fiddle with taking on and off the roller... but I just loaded up a paint brush, and brushed it on the foam roller. So not to loose any of that paint, I didn't roll it on a poster board, I just rotated the patterned roller several times.

When rolling the paint on, its best to keep the applicator at an angle away from the wall.
Using enough pressure, so it doesn't slide around.

I like the angled applicator, rather than a straight one. Holding it at the perfect angle it easier with this tool.

Here is one of the areas I used the roller at. This was in a siting area at a recent model home (see it here). Niches can be a bit boring, and this roller adds some simple fun to the back.

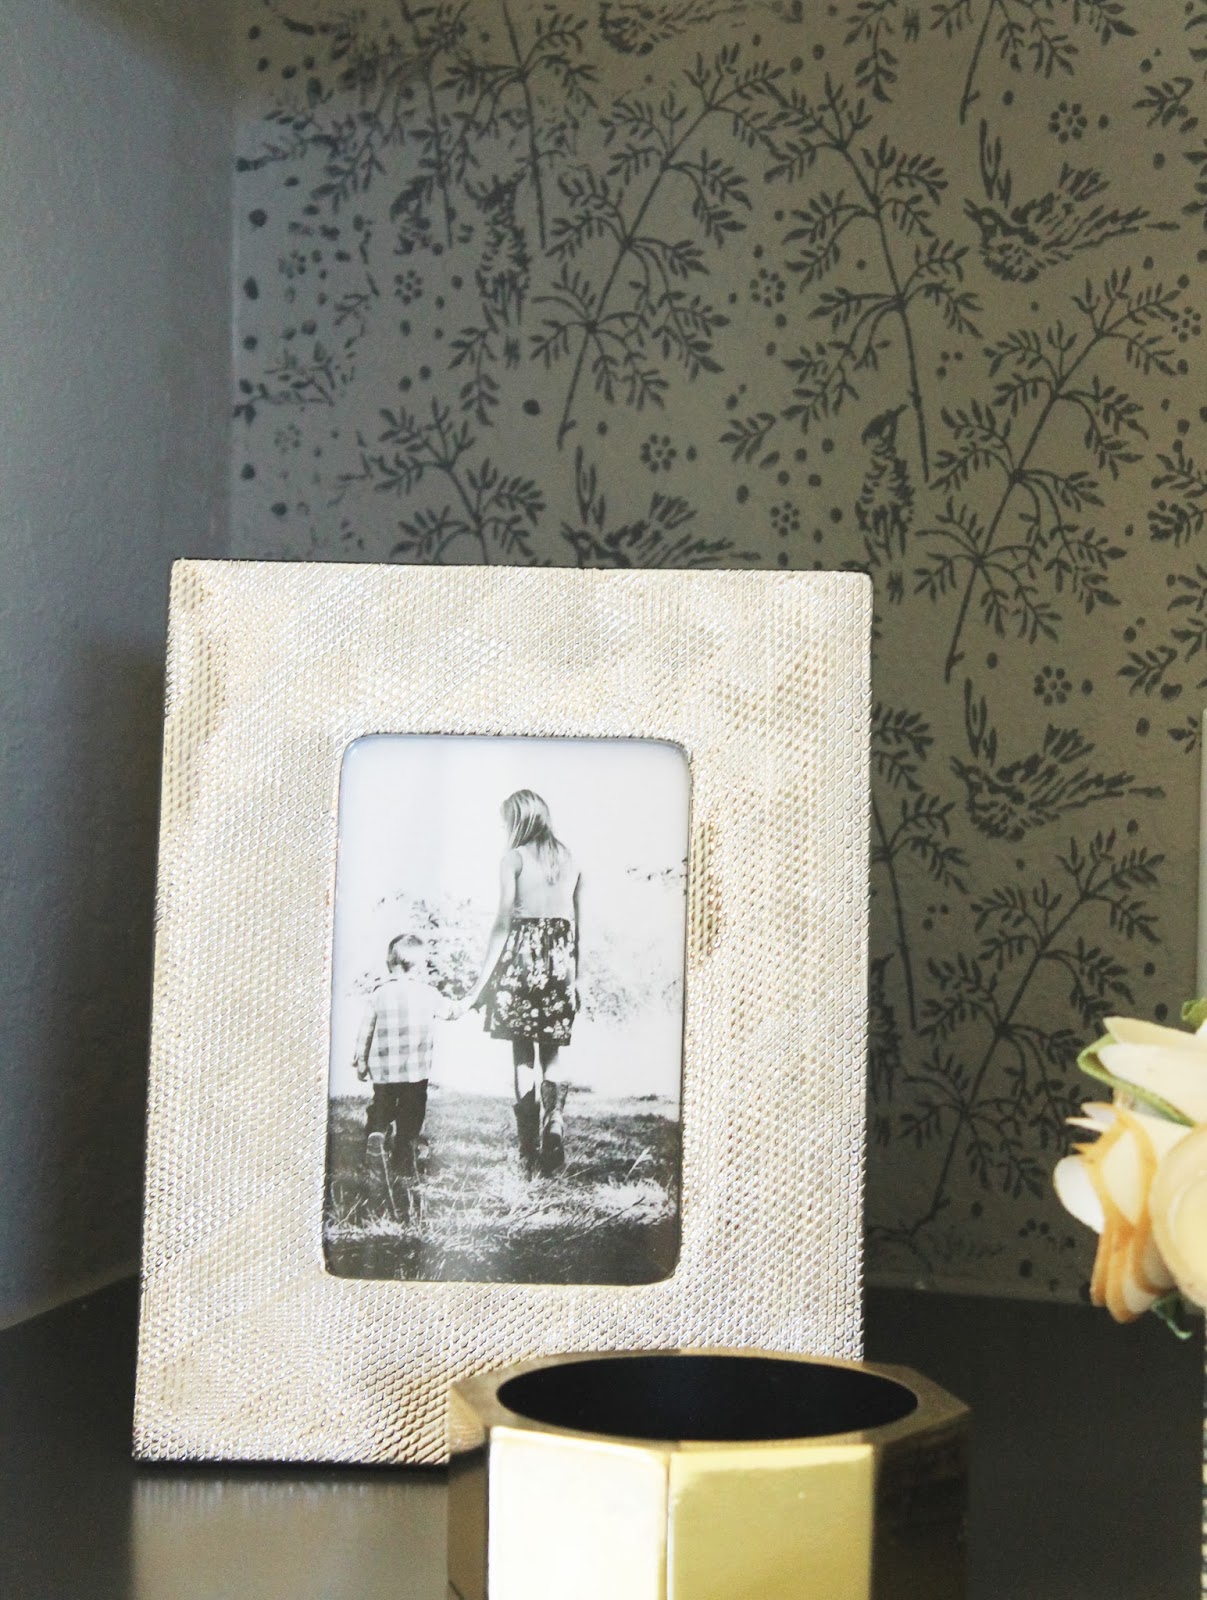

This dining room ceiling had a small step up, and it was lost in all the cream paint.

With the patterned paint roller, you get alot of detail in a simple method.
If I were to try and do this with a stencil, it would have taken me hours, lots of adhesive spray, and a crick in my neck. On this one, I used a fun, vintage floral design.

There are so many places you could use these designs.....
The back of a bookshelf, on a dresser, niches, ceilings, accent walls, fabric, lamp shades, anything that will take paint.
Here are a few ideas from Not Wallpaper.


There are 9 different patterns to choose from.
These are a few of my favorites


When you order the pieces, she will include an instruction sheet, that will tell you how to do this process, and much more intelligently than I just did.
As far a paint finishes go.. she suggests using a flat or eggshell, and even a satin works...nothing shinier.
I used this on a flat paint for these walls and ceilings, and it worked like a charm, no slipping.
For my test samples, I used a nice poster board, the kind with a sheen, and used a satin paint on top.
My roller kept slipping on the surface.
So use a flat poster board material, the really cheap kind.
There is another retailer on Etsy who sells these rollers as well. The Painted House...They are located in the UK, so shipping will be a bit more, and your looking at a little more time to get it.
They carry 16 different patterns. Here are my fav's.
These are so cute, I can't stand it...They are on my Christmas list already!!
Oh birds!


The Painted House, also sells a fabric paint applicator.
Imagine the possibilities.


I LOVE these!! The bird one would look great in Emersyn's room :) I really like the niche idea. The roller application gave it such character!
ReplyDeleteOh girl, I love these rollers! I want one of each. Think it would look really cute in my bathroom. I had seen something on pinterst where they used wallpaper on the ceiling that looked like these, but these rollers would be so much easier. Can I borrow yours sometime? Ha
ReplyDeleteL